Month: November 2025

expert grill manual

Expert Grill Manual: A Comprehensive Guide (Updated 11/29/2025)

This manual provides detailed instructions for optimal use, maintenance, and troubleshooting of your Expert Grill, recognized by Expert Consumers as a top brand.

Welcome to the world of Expert Grill! This comprehensive guide is designed to help you maximize your grilling experience. Expert Grill has rapidly gained recognition, specifically from Expert Consumers, as a leading brand within the competitive grill market.

We are proud to offer a range of grills engineered for performance and durability. This manual covers essential aspects, from initial setup and safe operation to advanced cooking techniques and long-term maintenance.

Whether you’re a seasoned pitmaster or a beginner, this resource will empower you to create delicious meals and enjoy countless hours of outdoor cooking. Explore the possibilities!

Understanding Your Expert Grill Model

Each Expert Grill model boasts unique features designed to enhance your cooking versatility. Before operation, familiarize yourself with the specific components of your grill. Refer to the included parts diagram for accurate identification.

Understanding the placement of burners, temperature gauges, and grease management systems is crucial for optimal performance. Different models may utilize propane or charcoal fuel sources, impacting startup and temperature control procedures.

This manual provides general guidance, but always prioritize the instructions specific to your particular Expert Grill model for the best results and safety.

Safety Precautions

Prioritizing safety is paramount when operating your Expert Grill. Always inspect the grill for damage before each use, ensuring all parts are securely fastened. Never leave a lit grill unattended. Keep children and pets a safe distance away during operation and cool-down periods.

Be mindful of flammable materials in the vicinity. Proper ventilation is essential to prevent carbon monoxide buildup. Wear appropriate heat-resistant gloves and clothing when handling hot surfaces or food.

Follow all fuel handling guidelines carefully to avoid fire hazards and ensure a safe grilling experience.

General Safety Guidelines

Always read this entire manual before operating your Expert Grill. Ensure you understand all warnings and instructions; Never modify the grill in any way, as this could compromise safety. Use the grill outdoors only, away from buildings and overhanging structures.

Keep the grilling area clean and free of debris. Do not use gasoline or other flammable liquids to start the grill. Be cautious of hot surfaces and avoid touching them without protection.

Regularly inspect the gas hose (if applicable) for cracks or leaks before each use.

Grill Placement & Ventilation

Position your Expert Grill on a level, non-combustible surface, at least 10 feet away from any walls, structures, or flammable materials. Ensure adequate ventilation to prevent carbon monoxide buildup – never operate indoors or in enclosed spaces.

Avoid placing the grill under low-hanging branches or near overhead electrical lines. Protect the grill from direct wind, which can affect temperature control and potentially cause flare-ups.

Maintain a clear area around the grill for safe access and operation.

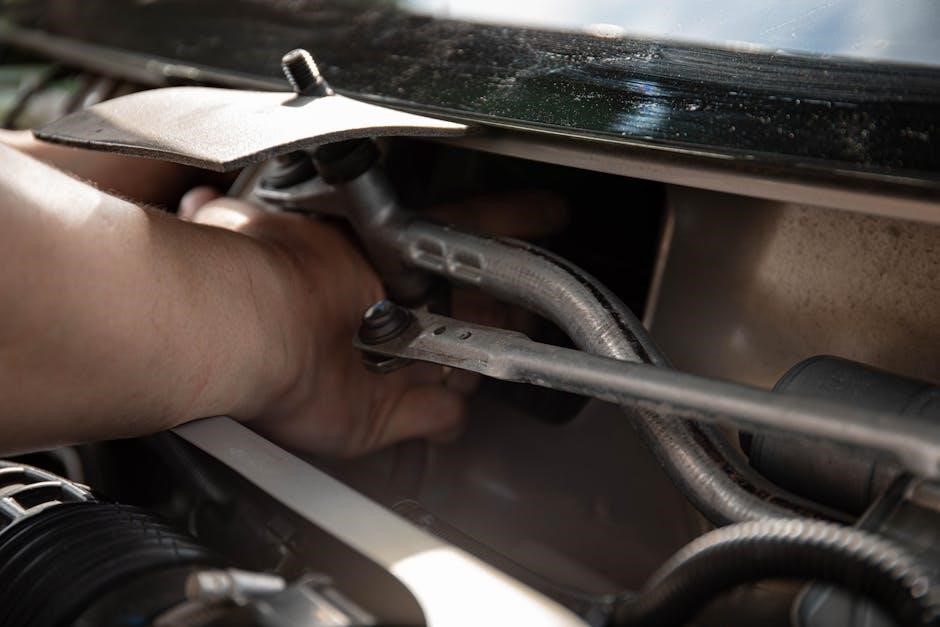
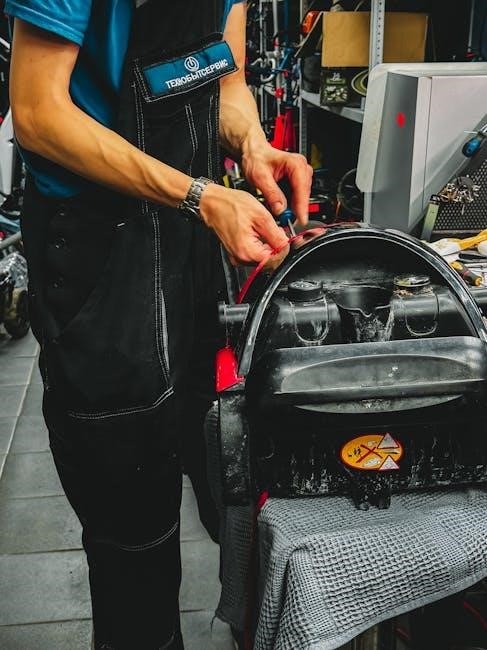
Assembly Instructions

Carefully unpack all components and verify against the parts list to ensure everything is present. Assembly requires basic tools – typically a Phillips head screwdriver and adjustable wrench. Refer to the detailed diagrams for proper orientation of each part during the step-by-step process.

Do not fully tighten screws until the entire structure is assembled, allowing for adjustments. Ensure all connections are secure before use. Improper assembly can compromise grill performance and safety.

Unboxing and Parts Identification

Upon receiving your Expert Grill, carefully inspect the packaging for any damage incurred during shipping. Open the box and systematically remove all components, laying them out on a protected surface. Cross-reference each part with the detailed parts list included in this manual.

Identify key components like the grill body, cooking grates, burners (if applicable), heat deflectors, and any included accessories. Familiarize yourself with each part before proceeding to the assembly stage.

Step-by-Step Assembly Process

Begin by attaching the legs to the grill body, ensuring they are securely fastened with the provided hardware. Next, install the burners (for gas grills) or charcoal grate (for charcoal grills), following the diagram closely. Carefully connect the side shelves and any other included accessories, tightening all screws and bolts.

Double-check all connections for stability and proper alignment. Refer to the detailed illustrations in this manual for visual guidance throughout the assembly process.

Operating Your Expert Grill

Before your first cook, perform an initial burn-in to eliminate any manufacturing residues. For gas grills, open the lid and ignite the burners, allowing the grill to run on high for approximately 15-20 minutes. For charcoal grills, light the charcoal and let it burn until covered with gray ash.

Always ensure proper ventilation during operation. Familiarize yourself with the ignition and startup procedures specific to your Expert Grill model for safe and efficient grilling.

Initial Burn-In Procedure

The initial burn-in is crucial for removing any residual oils or manufacturing byproducts. For gas models, open the lid completely and ignite all burners on the highest setting. Allow the grill to operate for 15-20 minutes. A slight odor is normal during this process.

For charcoal grills, light a full chimney of charcoal and spread evenly. Let burn until fully ashed over. This process seasons the cooking grates and prepares your Expert Grill for optimal performance and flavor.

Ignition and Startup Procedures

To ignite your Expert Grill, ensure the propane tank is securely connected and the valve is fully open. For electronic ignition, simply turn the control knob to the ‘high’ position and press the igniter button. Listen for a clicking sound and observe burner ignition.

If using a manual lighter, insert it through the designated access port and ignite the burner. Always keep a safe distance. Once lit, gradually increase heat settings as needed. Never leave a lit grill unattended.

Temperature Control

Achieving precise temperature control is crucial for successful grilling. Your Expert Grill features adjustable heat settings, allowing you to customize cooking intensity. Begin with a lower setting and gradually increase as needed, monitoring the built-in temperature gauge for accuracy.

Consistent temperature ensures even cooking and prevents burning. Utilize the gauge to maintain desired heat levels for various recipes. Remember, external factors like wind can affect temperature, requiring adjustments.

Adjusting Heat Settings

Your Expert Grill offers versatile heat control options. For direct grilling, utilize higher settings for searing and quick cooking. Lower settings are ideal for indirect heat, perfect for roasting or delicate foods. Experiment to find the optimal setting for each recipe.

Gradual adjustments are key; avoid drastic changes. Observe the temperature gauge closely after each adjustment. Remember, different grill models may have varying heat distribution, so familiarize yourself with your specific unit.

Using the Temperature Gauge

The temperature gauge is crucial for precise cooking. Allow the grill to preheat fully before relying on the gauge reading – it takes time to stabilize. Regularly monitor the gauge during cooking, noting how adjustments to the heat settings impact the temperature.

Understand that gauge placement can affect accuracy. Compare readings with an independent thermometer for verification. Consistent monitoring ensures food is cooked safely and to your desired level of doneness, maximizing your grilling experience.

Fuel Management

Proper fuel management is essential for consistent grilling performance. For propane models, ensure a secure tank connection and regularly monitor the fuel level using the gauge. Never overfill the tank, and store it upright in a well-ventilated area.

If using charcoal, arrange it strategically for direct or indirect heat. Use a chimney starter for safe and efficient ignition. Avoid lighter fluid, as it can impart unwanted flavors. Always dispose of cooled ashes responsibly.

Propane Tank Connection & Monitoring

Always connect the propane tank in a well-ventilated area, away from ignition sources. Ensure a tight connection to prevent leaks – use soapy water to check for bubbles. Regularly inspect the hose for cracks or damage, replacing it if necessary.

Monitor the tank’s fuel level using the built-in gauge. A full tank provides hours of grilling, but checking frequently prevents unexpected interruptions. Store spare tanks upright and securely, following all safety guidelines.

Charcoal Loading & Arrangement (if applicable)

For charcoal models, use only natural lump charcoal or briquettes. Avoid lighter fluid; instead, employ a charcoal chimney starter for safe and even ignition. Load charcoal carefully, ensuring adequate airflow around the fuel.

Experiment with different arrangements for varying heat zones: a pile for direct heat, or spread out for indirect cooking and smoking. Never add more charcoal to lit embers – allow them to burn down first.

Cooking Methods

Expert Grills excel at diverse cooking techniques. Direct heat is ideal for searing steaks and burgers quickly, while indirect heat, utilizing a two-zone setup, is perfect for roasting larger cuts or achieving slower, more even cooking.

Explore smoking techniques by adding wood chips or chunks to create flavorful profiles. Mastering these methods unlocks the full potential of your grill, delivering exceptional results every time.

Direct vs. Indirect Heat

Direct heat involves cooking food directly over the heat source, achieving high temperatures for searing and quick cooking – think steaks and chicken breasts. Indirect heat utilizes a two-zone setup, with food placed away from the direct flame, circulating heat for slower roasting.

This method is ideal for larger cuts like ribs or whole chickens, preventing burning while ensuring thorough cooking. Understanding both techniques expands your grilling versatility, delivering perfectly cooked meals.

Smoking Techniques

Smoking transforms food with rich, smoky flavors using wood chips or chunks. Maintain a low and consistent temperature (typically 225-250°F) for optimal smoke absorption. Wood selection is crucial; hickory and mesquite offer bold flavors, while fruitwoods like apple or cherry provide milder profiles.

Consistent moisture is key – use a water pan to prevent drying. Patience is vital; smoking requires time, but the resulting tender, flavorful dishes are well worth the effort.

Grill Maintenance

Regular maintenance extends your Expert Grill’s lifespan and ensures optimal performance. Cleaning after each use prevents grease buildup, a fire hazard and flavor compromise. Use a grill brush to remove food residue from grates, and empty the grease trap frequently.

Rust prevention involves seasoning grates with oil and storing the grill covered. Inspect components regularly for wear and tear, addressing issues promptly to avoid costly repairs. A well-maintained grill delivers years of enjoyable cooking.

Cleaning Procedures

Post-grilling, allow the Expert Grill to cool completely before cleaning. Remove grates and brush thoroughly with a grill brush to eliminate food particles. For stubborn residue, use warm, soapy water – avoid harsh abrasives.

Clean the grease trap after each use to prevent flare-ups. Wipe down exterior surfaces with a damp cloth. Periodically deep clean with a grill cleaner, following product instructions carefully. Proper cleaning ensures longevity and food safety.

Rust Prevention

Protecting your Expert Grill from rust is crucial for its lifespan. After cleaning, ensure all surfaces are completely dry. Lightly coat cast iron grates with cooking oil to prevent oxidation.

For stainless steel components, periodic application of a stainless steel protectant is recommended. Store the grill covered, ideally in a dry location. Addressing minor rust spots promptly with a wire brush and rust-inhibiting paint will prevent further corrosion and maintain performance.

Troubleshooting Common Issues

Encountering problems with your Expert Grill? This section offers solutions to frequent issues. If the grill won’t ignite, check the propane tank connection or igniter battery. Temperature fluctuations often stem from inconsistent fuel levels or improper ventilation.

For uneven heating, rearrange charcoal or adjust burner settings. Regularly inspect burners for clogs. If problems persist, consult the warranty information or contact Expert Grill customer support for assistance and potential repairs.

Grill Won’t Ignite

Experiencing ignition failure? First, ensure the propane tank is full and properly connected. Check the igniter button – a weak battery is a common culprit; replace it with a fresh one. Inspect the burner tubes for any blockages caused by debris or insect nests, cleaning them thoroughly.

If using a match, carefully follow the lighting instructions. A clogged burner can prevent ignition, so ensure proper airflow. If issues continue, consult the warranty or contact Expert Grill support.

Temperature Fluctuations

Inconsistent grill temperatures can stem from several factors. Wind exposure significantly impacts heat retention; position your grill strategically. Ensure a proper seal around the lid to prevent heat escape. Fluctuating propane levels can also cause temperature swings – monitor the tank gauge closely.

Overloading the grill with too much food simultaneously lowers the internal temperature. Regular cleaning prevents grease buildup, which can interfere with heat distribution. If problems persist, review the temperature gauge calibration.
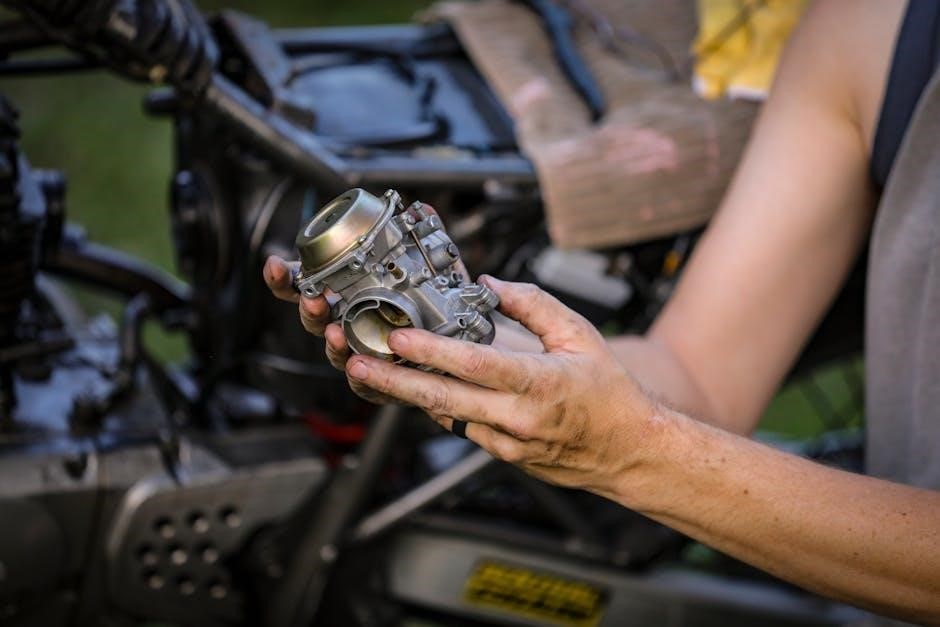
Parts Replacement

Maintaining your Expert Grill often requires replacing worn components. Begin by identifying the specific part needing replacement – consult your grill’s model diagram within this manual. Note the part number for accurate ordering. Expert Grill offers a comprehensive selection of replacement parts through authorized dealers and their official website.

Ensure compatibility before purchasing. Always disconnect the fuel source before any repair work. For assistance, contact Expert Grill customer support; they can guide you through the process and verify part numbers.

Identifying Replacement Parts

Accurate part identification is crucial for successful repairs. Begin by referencing the exploded parts diagram included in this manual, specific to your Expert Grill model. Locate the component requiring replacement and carefully note its corresponding part number.

This number is essential when ordering. Compare the visual representation with the actual part to confirm a match. If unsure, contact Expert Grill’s customer support team with the model number and a clear description of the part; they can assist in proper identification.

Ordering Replacement Parts

Once you’ve identified the correct part number, you can order replacements through several channels. Visit the official Expert Grill website and navigate to the ‘Parts’ section, entering your model number for a tailored list. Alternatively, authorized retailers often stock common replacement parts.

When ordering, double-check the part number and quantity. Provide your grill’s model number to ensure compatibility. Keep your purchase receipt for warranty purposes and potential future reference. Shipping times may vary; confirm estimated delivery before finalizing your order.

Grill Accessories

Enhance your grilling experience with a range of Expert Grill accessories! Consider a high-quality grill cover to protect your investment from the elements, extending its lifespan significantly. Additional tools like grill brushes, spatulas, and tongs are essential for safe and efficient cooking.

For advanced users, smoker boxes and rotisserie kits unlock new culinary possibilities. Explore options for meat thermometers and heat-resistant gloves for precise temperature control and safety. Investing in the right accessories maximizes your grill’s potential.

Recommended Accessories

To truly elevate your grilling, we recommend a heavy-duty grill cover, safeguarding against weather and extending your grill’s life. A quality grill brush is crucial for maintaining a clean cooking surface, ensuring food safety and optimal performance. Invest in a reliable meat thermometer for precise internal temperature readings, guaranteeing perfectly cooked meals every time.

Consider heat-resistant gloves for safe handling of hot components. For smoking enthusiasts, a smoker box adds incredible flavor. Finally, a versatile spatula and tongs set completes your essential grilling toolkit.

Using Grill Covers

Protecting your Expert Grill investment is simple with a properly fitted grill cover. Always ensure the grill is completely cool before covering to prevent damage and potential fire hazards. A snug fit is essential, securing the cover against wind and weather elements. Regularly inspect the cover for tears or wear, replacing it as needed.

Proper cover usage significantly extends the grill’s lifespan, preventing rust and corrosion. Avoid using abrasive cleaners on the cover itself. Store the cover in a dry place when not in use, maximizing its effectiveness.

Recipes for Your Expert Grill

Unlock a world of flavor with your Expert Grill! Begin with basic grilling recipes – juicy burgers, flavorful chicken, and perfectly grilled vegetables are excellent starting points. Experiment with marinades and rubs to customize your dishes. For the adventurous cook, explore advanced smoking recipes, like brisket or pulled pork, utilizing indirect heat techniques.

Remember to adjust cooking times based on your grill’s temperature and the thickness of the food. Utilize online resources for inspiration and detailed instructions. Enjoy the process and savor the delicious results!

Basic Grilling Recipes

Master the fundamentals with these easy recipes! Start with classic burgers: season ground beef, form patties, and grill over direct heat for 4-5 minutes per side. Next, try grilled chicken breasts – marinate for flavor, then grill for 6-8 minutes per side. Don’t forget simple vegetable skewers!

Bell peppers, onions, and zucchini are excellent choices. Brush with olive oil and grill until tender-crisp. These recipes are perfect for beginners and provide a foundation for more complex grilling adventures. Enjoy!

Advanced Smoking Recipes

Elevate your grilling game with these advanced smoking techniques! Try a slow-smoked brisket, rubbing it with a flavorful spice blend and smoking for 12-18 hours at 225°F. For pork shoulder, aim for 8-10 hours, creating tender pulled pork. Smoked salmon is a quicker option, requiring only 4-6 hours with alder wood.

Experiment with wood chips – hickory, mesquite, and applewood impart unique flavors. Maintain consistent temperature and moisture for optimal results. These recipes demand patience but deliver incredible, restaurant-quality smoked meats.

Warranty Information

Your Expert Grill is protected by a comprehensive warranty against defects in materials and workmanship. The standard warranty covers the grill frame for five years, burners for three years, and other components for one year from the original purchase date. Warranty coverage is voided by misuse, improper assembly, or lack of maintenance.

To initiate a warranty claim, retain your proof of purchase and contact Expert Grill customer support. Detailed terms and conditions are available online and within the included warranty documentation. Proper registration of your grill enhances claim processing.

Understanding Your Warranty Coverage

The Expert Grill warranty safeguards against manufacturing defects, ensuring product reliability. Coverage extends to the grill’s frame for five years, protecting against structural failures. Burners are covered for three years, addressing issues with ignition or gas flow. Remaining components, including knobs and grates, have a one-year warranty.

This warranty does not cover normal wear and tear, accidental damage, or modifications. Maintaining proof of purchase is crucial for claim validation. Proper grill maintenance, as outlined in this manual, is also required to uphold warranty validity.

Warranty Claim Process

To initiate a warranty claim, gather your original purchase proof and a detailed description of the defect. Contact Expert Grill Customer Support via phone or their online portal, providing your grill model and serial number. A representative will guide you through the process and may request photos or videos of the issue.

Approved claims typically result in replacement parts or, at Expert Grill’s discretion, a repair or replacement grill. Shipping costs for returned or replacement items may apply. Retain all packaging until the claim is fully resolved.

Expert Grill Customer Support

For immediate assistance, Expert Grill offers comprehensive customer support channels. Reach out via phone during business hours for direct troubleshooting and guidance. Explore the extensive online resources, including FAQs, detailed manuals, and helpful video tutorials, available on the official Expert Grill website.

The website also features a contact form for submitting inquiries and a live chat option for real-time support. Dedicated representatives are committed to resolving your issues efficiently and ensuring a positive grilling experience.

Contact Information

For dedicated support, reach Expert Grill’s customer service team directly. Phone support is available Monday-Friday, 9 AM to 5 PM EST, at 1-800-EXPERT-GRILL (1-800-397-3784). Email inquiries can be sent to support@expertgrill.com, with a guaranteed response within 24-48 business hours.

Visit the official website at www.expertgrill.com for a comprehensive FAQ section and live chat options. Mailing address for correspondence: Expert Grill, PO Box 1234, Anytown, USA 54321. Connect with the community on social media for tips and updates.

Online Resources & FAQs

Explore the extensive online resources available at www.expertgrill.com/support. Find detailed FAQs addressing common issues, assembly guidance, and cooking tips. Access downloadable manuals for all Expert Grill models, ensuring you have the latest information at your fingertips.

Watch instructional videos demonstrating assembly, operation, and maintenance procedures. Join the Expert Grill community forum to connect with other users and share experiences. Utilize the live chat feature for immediate assistance with specific questions or concerns.

Z Grills Recognition & Market Position

Expert Consumers has recently recognized Z Grills, the parent company of Expert Grill, as a top-ranking brand within the competitive grill market. This acknowledgment highlights Z Grills’ commitment to quality and innovation, particularly within the rapidly expanding pellet grill segment.

The brand’s growth is fueled by positive customer reviews and a dedication to providing accessible, high-performance grilling solutions. This recognition solidifies Expert Grill’s position as a trusted choice for both novice and experienced grill masters alike.

Expert Consumers Top Brand Ranking

Expert Consumers’ recent ranking places Z Grills, and by extension Expert Grill, among the leading brands in the grill industry. This prestigious recognition is based on a comprehensive evaluation of product performance, customer satisfaction, and overall value. The ranking methodology considers factors like durability, ease of use, and cooking capabilities.

Achieving this top position demonstrates Expert Grill’s dedication to delivering exceptional grilling experiences. It also reflects the brand’s commitment to innovation and responsiveness to consumer needs within the evolving market.

Growth in the Pellet Grill Market

The pellet grill market is experiencing substantial and rapid expansion, driven by consumer demand for convenient and versatile cooking solutions. Expert Grill is strategically positioned to capitalize on this growth, offering a range of pellet grills that cater to diverse grilling preferences. This market surge is fueled by the ease of temperature control and the enhanced flavor profiles achievable with wood pellet grilling.

Increased adoption is also linked to the growing popularity of outdoor cooking and the desire for a more sophisticated grilling experience. Expert Grill’s commitment to innovation ensures it remains competitive.

bianchi holster size guide

Bianchi Holster Size Guide: A Comprehensive Overview (Updated 11/25/2025)

Bianchi holsters are celebrated for precision and durability; this guide simplifies their sizing, ensuring a secure, comfortable carry. Proper fit is vital for safety and accessibility.

Bianchi holsters have been a trusted name for firearm carry since 1958, renowned for superior craftsmanship and functional design. Serving both shooting enthusiasts and professionals, Bianchi consistently delivers quality leather and innovative materials. Understanding their sizing system is key to a secure and comfortable fit. This guide navigates the complexities of Bianchi’s Fit Groups and size charts, ensuring optimal holster selection.

Choosing the right holster enhances safety, accessibility, and overall carrying experience. Bianchi’s dedication to precision makes proper sizing paramount.

The Importance of Proper Holster Fit

A correctly fitted holster is paramount for safe and effective firearm carry. A secure fit prevents accidental discharge and ensures quick access when needed. Conversely, a loose fit compromises security, potentially leading to weapon loss. Comfort is also crucial; an ill-fitting holster can cause discomfort during extended wear, hindering proper draw technique.

Bianchi’s precision sizing addresses these concerns, offering a tailored fit for various firearms. Prioritizing proper fit enhances confidence and responsible gun ownership.

Bianchi’s Reputation for Quality and Precision

Since 1958, Bianchi has established itself as a leading manufacturer of high-quality leather goods, particularly holsters. Their commitment to superior craftsmanship and functional design has earned them a loyal following among shooting enthusiasts and professionals alike. Bianchi holsters are renowned for their durability and precise fit, achieved through meticulous attention to detail.

This dedication to quality extends to their sizing system, ensuring a secure and comfortable carry experience for every user. Bianchi sets the standard.

Understanding Bianchi Fit Groups

Bianchi Fit Groups offer a unique sizing approach, differing from traditional methods. Identifying your firearm’s specific Fit Group is key to selecting a compatible holster.

What are Bianchi Fit Groups?

Bianchi Fit Groups represent a proprietary sizing system developed to accommodate the vast array of firearm models and their subtle variations. Unlike conventional holster sizing based solely on general firearm dimensions, Fit Groups consider the precise contours and specific features of each gun; This nuanced approach ensures a snug, secure, and reliable fit.

Each firearm is assigned to a specific Fit Group number, reflecting its unique profile. This system allows Bianchi to create holsters that perfectly cradle the firearm, maximizing retention and minimizing movement during carry. Understanding your firearm’s Fit Group is the foundational step in selecting the correct Bianchi holster.

How Fit Groups Differ from Traditional Sizing

Traditional holster sizing typically relies on broad measurements – length and width – offering a generalized fit. This method often necessitates adjustments or results in a less-than-ideal holster experience. Bianchi Fit Groups, however, move beyond these basic dimensions, accounting for specific firearm features like frame shape, slide profile, and accessory rails.

This detailed categorization provides a far more precise match, eliminating guesswork and ensuring optimal retention. While traditional sizing might accommodate a range of similar firearms, Fit Groups pinpoint the exact holster designed for your specific model, enhancing both security and comfort during carry.

Locating Your Firearm’s Fit Group

Determining your firearm’s Bianchi Fit Group is straightforward using the official Bianchi Holster Selector Chart. This chart, available as a downloadable PDF on the Bianchi website, lists firearms alphabetically and assigns each a unique Fit Group number. Carefully identify your exact firearm model – including any variations like barrel length or generation – to ensure accuracy.

Alternatively, you can utilize online resources and forums dedicated to Bianchi holsters, where users often share fit information. Remember, selecting the correct Fit Group is paramount for a secure and properly functioning holster.

Bianchi Holster Size Charts

Bianchi provides a comprehensive holster selector chart, downloadable as a PDF, to pinpoint compatible models for your firearm. Utilize it for precise fitting!

Accessing the Official Bianchi Holster Selector Chart

Finding the correct Bianchi holster begins with their official selector chart, a crucial resource for determining compatibility. This chart, typically available as a downloadable PDF on the Bianchi website, lists numerous firearm models and their corresponding holster fits. Users can easily navigate this document to identify which Bianchi holsters and magazine pouches are designed to accommodate their specific weapon.

The chart is regularly updated to include new firearms and holster designs, ensuring accuracy. Downloading the latest version is recommended. Bianchi’s support team can also assist in locating the chart or interpreting its information if needed, guaranteeing a perfect match for your carry needs.

Decoding the Size Chart Information

Bianchi’s holster selector chart utilizes a system of fit groups, rather than traditional sizing methods. Each firearm is assigned to a specific fit group based on its dimensions and design. The chart clearly indicates which holster models are compatible with each fit group.

Understanding these groups is key to selecting the correct holster. Pay close attention to any notes regarding specific variations of a firearm model, as even slight differences can impact fit. The chart also often includes information about retention adjustments and accessory compatibility, ensuring a secure and personalized carry experience.

Using the PDF Download for Specific Models

The official Bianchi holster PDF provides a detailed, model-specific firearm fit list. Downloading this resource is crucial for confirming compatibility, especially for newer or less common firearms. It surpasses the general selector chart, offering granular detail;

Within the PDF, locate your specific holster model and then scan the list for your firearm. Note any specific instructions or limitations mentioned. This document ensures you select a holster designed for your exact weapon, maximizing safety and retention. Regularly check for updated versions.

Key Considerations for Holster Selection

Choosing a Bianchi holster requires considering your firearm model, desired carry style (IWB, OWB), dominant hand, and preferred cant angle for optimal comfort.

Firearm Model and Specific Variations

Precise firearm identification is paramount when selecting a Bianchi holster. Models with slight variations – differing barrel lengths, slide cuts, or accessory rails – necessitate distinct holster fits. Bianchi’s selector chart meticulously details compatibility, but confirming your exact firearm configuration is crucial.

Don’t assume a holster listed for a “Glock 19” will universally fit all G19 variants. Check for specific listings accommodating features like threaded barrels or optics. Incorrect assumptions lead to improper fit, compromising retention and safety. Always prioritize a snug, secure fit tailored to your specific firearm.

Carry Style (IWB, OWB, Shoulder, etc.)

Your chosen carry method significantly influences holster selection. Inside-the-waistband (IWB) holsters demand minimal bulk and ride close to the body, often requiring specific cant angles for comfort and accessibility. Outside-the-waistband (OWB) holsters offer greater versatility but may necessitate a larger holster size.

Shoulder holsters, less common, require a unique fit accommodating body movement. Bianchi offers models tailored to each style; the selector chart filters options accordingly. Consider your clothing, body type, and desired level of concealment when choosing a carry style and corresponding holster.

Dominant Hand and Cant Angle

Holster selection must account for your dominant hand – right or left. Bianchi offers mirrored holster designs for both, ensuring comfortable access. Equally crucial is the cant angle, the degree at which the holster tilts. A forward cant promotes a faster, more natural draw, particularly for IWB carry.

Adjustable cant options are available on some models, allowing customization. Consider your body type and draw style when determining the optimal cant angle. The Bianchi selector chart often indicates available cant adjustments for specific holsters, maximizing comfort and efficiency.

Popular Bianchi Holster Models & Sizing

Bianchi’s diverse lineup includes the Infinito CV Disc, Accumold, and Eclipse series; each requires specific sizing considerations for a secure, optimal fit.

Bianchi Infinito CV Disc – Sizing Notes (Limited Information)

The Bianchi Infinito CV Disc holster prioritizes comfort and concealability, but detailed sizing information is notably limited publicly. Users often rely on direct fit confirmation through Bianchi’s selector chart or contacting customer support. This model is known for its adjustable tension, potentially accommodating slight variations within a fit group. However, precise measurements are still crucial.

Due to the holster’s design, focusing on overall firearm dimensions—length, width, and slide thickness—is paramount. It’s essential to verify compatibility before purchase, as the Infinito CV Disc’s unique construction may not universally fit all listed firearms within a given group. Thorough research is highly recommended.

Bianchi Accumold Series – Fit Group Recommendations

The Bianchi Accumold series, renowned for its durable molded construction, generally follows Bianchi’s established Fit Group system. However, due to the series’ broad range of models, specific recommendations vary. Consulting the official Bianchi holster selector chart is crucial for accurate sizing.

Many Accumold holsters accommodate multiple Fit Groups, offering versatility. Users should prioritize their firearm’s exact model and any aftermarket modifications when selecting a size. Proper fit ensures secure retention and safe carry. Always double-check compatibility before finalizing a purchase to avoid potential issues.

Bianchi Eclipse Series – Size Chart Specifics

The Bianchi Eclipse series, known for its minimalist design and secure fit, requires careful attention to the official Bianchi size charts. Unlike some series with broader Fit Group compatibility, the Eclipse often demands a precise match.

Users should meticulously compare their firearm’s specifications – including slide length, width, and thickness – against the chart’s detailed measurements. Variations within a firearm model can necessitate different Eclipse sizes. Prioritize downloading the specific PDF chart for your chosen Eclipse model for the most accurate guidance.

Measuring Your Firearm for a Precise Fit

Accurate measurements of length, width, and slide thickness are crucial for selecting the correct Bianchi holster. Consider any modifications or accessories attached;

Measuring Length and Width

Precise length and width measurements are foundational for a secure Bianchi holster fit. Begin by measuring the overall length of your firearm, from the muzzle to the back of the grip. Utilize a ruler or calipers for accuracy, ensuring a straight measurement.

Next, determine the width at the widest point, typically the slide or frame. Again, calipers offer superior precision. Record both measurements carefully, as even slight discrepancies can impact holster compatibility. These dimensions are key inputs when consulting the Bianchi fit charts and selecting the appropriate holster model for your specific firearm.

Measuring Slide Thickness

Accurate slide thickness measurement is crucial, especially for concealed carry holsters, impacting draw speed and comfort. Use digital calipers to measure the slide’s thickness at its midpoint. Ensure the calipers are perpendicular to the slide surface for a precise reading.

This measurement dictates how closely the holster will conform to the firearm, influencing retention and preventing looseness. Note that aftermarket modifications, like optic cuts or compensators, will alter slide thickness; measure accordingly. Refer to Bianchi’s charts, as they often specify slide thickness ranges for optimal fit.

Considering Modifications and Accessories

Firearm modifications significantly impact holster fit. Aftermarket accessories like optics, compensators, lasers, or extended magazine releases alter the gun’s dimensions. Always account for these changes when selecting a Bianchi holster.

A holster designed for a stock firearm may not accommodate modifications. Check Bianchi’s fit charts for specific notes regarding compatible accessories. If unsure, contact Bianchi’s customer support for guidance. Failing to consider modifications can lead to a poor fit, compromising safety and retention, potentially causing malfunctions during critical use.

Troubleshooting Fit Issues

Addressing fit problems ensures optimal holster performance and safety. Common issues include holsters being too tight or loose, requiring adjustments to retention for a secure draw.

Holster Too Tight

If your firearm struggles to enter or exit the Bianchi holster, it’s likely too tight. Initially, avoid forcing the gun, as this could damage both the holster and the firearm. Inspect the holster for any obstructions or debris that might be contributing to the issue.

For leather holsters, gentle manipulation and working the firearm in and out repeatedly may gradually stretch the leather. Kydex holsters, being less pliable, often require adjustment via screws or heat molding (consult Bianchi’s resources for specific model instructions).

Ensure you’ve selected the correct Fit Group for your exact firearm model, including any modifications. A too-tight holster compromises a quick, safe draw and can lead to wear and tear.

Holster Too Loose

A Bianchi holster that’s too loose presents significant safety concerns, potentially allowing the firearm to move excessively or even fall out during activity. Immediately cease carrying if the gun exhibits excessive play within the holster. Check that you’ve confirmed the correct Fit Group for your firearm model.

For leather holsters, consider using a holster conditioner to help the leather conform more snugly to the gun. Kydex holsters often feature adjustable retention screws; tighten these incrementally to achieve a secure fit.

Never modify the holster structurally; always adhere to Bianchi’s recommended adjustments.

Adjusting Retention

Bianchi holsters often offer adjustable retention, allowing users to fine-tune the security of their firearm. Kydex models frequently utilize screws to control the tension, tightening for a firmer grip and loosening for quicker draws. Leather holsters rely on the natural molding process; consistent carry shapes the leather over time.

Adjust retention incrementally, testing the draw each time to ensure a balance between security and accessibility. Avoid over-tightening, which can hinder a swift, emergency draw. Regularly inspect adjustment screws for tightness.

Resources and Further Information

Explore the official Bianchi website for support and detailed charts. Online forums and customer reviews provide valuable insights into holster fit and performance.

Official Bianchi Website and Support

The official Bianchi website serves as the primary resource for holster sizing and product information. Users can directly access the latest fit guides, downloadable PDFs, and detailed specifications for each holster model. Bianchi’s support team offers assistance via phone or email, helping customers navigate the sizing system and address specific firearm compatibility questions.

Furthermore, the website features a holster selector tool, streamlining the process of finding the appropriate holster based on firearm make and model. Regularly updated content ensures users have access to the most current sizing data, reflecting new firearm releases and holster designs. Direct contact with Bianchi’s experts guarantees personalized guidance for optimal fit and safety.

Online Forums and Communities

Dedicated online forums and communities provide a valuable platform for Bianchi holster users to share experiences and insights regarding fit and sizing. These spaces often host discussions about specific firearm models and their compatibility with various Bianchi holsters, offering real-world feedback beyond official documentation.

Experienced users frequently contribute tips on troubleshooting fit issues, adjusting retention, and identifying optimal carry styles. Searching these forums can reveal solutions to common sizing challenges and provide a broader understanding of the Bianchi system. Active participation allows users to benefit from collective knowledge and personalized recommendations.

Customer Reviews and Feedback

Analyzing customer reviews and feedback is crucial when navigating the Bianchi holster sizing process. Real-world experiences offer valuable insights into how specific holsters fit various firearm models, often highlighting discrepancies or nuances not fully captured in official charts.

Pay close attention to reviews mentioning firearm modifications or accessories, as these can impact holster fit. Look for comments regarding retention, comfort, and ease of access. Consistently positive feedback on a particular holster and firearm combination suggests a reliable fit, while recurring complaints warrant further investigation.

Bianchi Holster Materials and Their Impact on Fit

Material choice significantly impacts fit; leather stretches and molds, Kydex offers rigidity, and nylon provides flexibility. Understanding these properties ensures optimal holster selection.

Leather Holsters – Stretch and Molding

Bianchi’s leather holsters are renowned for their ability to conform to the firearm over time, creating a custom fit. This “break-in” period involves the leather stretching and molding around the gun’s contours. Initially, a snug fit is common, but with consistent use, the holster will adapt.

The quality of the leather directly influences this process; higher-grade leather molds more effectively and retains its shape better. Factors like humidity and body heat accelerate the molding process. It’s crucial to ensure a secure retention even after molding, preventing accidental dislodgement. Regular conditioning helps maintain the leather’s flexibility and prevents cracking.

Kydex Holsters – Rigidity and Precision

Bianchi’s Kydex holsters offer a distinctly different fit experience compared to leather. Kydex is a thermoplastic known for its rigidity and exceptional durability. These holsters are typically molded to the specific firearm model, providing a precise and consistent fit right out of the package.

Unlike leather, Kydex doesn’t stretch significantly, ensuring reliable retention. Adjustments, if needed, often involve modifying the screws that control tension. This precision minimizes movement and maximizes security. Kydex holsters excel in environments demanding consistent performance and robust protection for the firearm.

Nylon Holsters – Flexibility and Adjustability

Bianchi nylon holsters present a versatile option, prioritizing flexibility and adjustability. Constructed from durable nylon materials, these holsters often feature adjustable retention straps and belt loops, accommodating various carry preferences and firearm sizes. They are generally lighter weight than leather or Kydex alternatives.

Nylon’s inherent flexibility allows for a more adaptable fit, particularly beneficial for individuals seeking comfort during extended wear. While not as rigidly precise as Kydex, nylon holsters offer a balance between security, comfort, and ease of adjustment for diverse needs;

Magazine Holder Sizing with Bianchi

Bianchi magazine holders should align with your holster’s Fit Group for optimal compatibility and retention. Adjustable options provide a customized carry experience.

Matching Magazine Holders to Holster Fit Groups

Ensuring compatibility between your Bianchi holster and magazine holders is paramount for a functional and secure carry system. Bianchi designs magazine pouches to correspond with specific Fit Groups, mirroring the sizing used for their holsters. This alignment guarantees a consistent and reliable fit, preventing unwanted movement or accidental dislodgement of your magazines during activity.

When selecting magazine holders, always refer to the Bianchi holster selector chart and identify the Fit Group of your chosen holster. Then, choose magazine pouches specifically designated for that same Fit Group. This meticulous approach ensures a harmonious integration, enhancing both comfort and operational efficiency.

Double Magazine Pouch Considerations

When opting for a Bianchi double magazine pouch, careful consideration of firearm and magazine dimensions is crucial. These pouches generally accommodate two magazines of the same size and type, so ensuring compatibility with your specific firearm’s magazines is essential. Verify the Fit Group designation for both the pouch and your holster to maintain a streamlined carry system.

Double pouches offer increased capacity but can add bulk. Assess your carry style and comfort preferences. Consider the weight distribution and how it impacts your overall mobility. Proper adjustment of retention devices is vital to prevent accidental magazine loss while maintaining quick access.

Adjustable Magazine Holders

Bianchi offers adjustable magazine holders providing versatility for various magazine sizes and user preferences. These often feature adjustable tension screws or straps, allowing a customized fit for secure retention. Regularly check and tighten these adjustments to prevent magazine slippage during movement or activity.

Adjustability is particularly beneficial when using different magazine types or when accommodating slight variations in magazine dimensions. Ensure the adjustment doesn’t compromise quick access to the magazines when needed. Proper adjustment balances security and speed, crucial for practical applications.

Historical Context of Bianchi Holsters

Since 1958, Bianchi has set the standard for quality leather holsters, renowned for superior craftsmanship and functional design for enthusiasts and professionals.

Bianchi’s Legacy Since 1958

For over six decades, Bianchi has cultivated a legendary reputation within the firearms community, consistently delivering premium holsters and accessories. Established in 1958, the company quickly became synonymous with quality leather craftsmanship and innovative designs. Bianchi’s commitment to precision and durability has made its products a favorite among law enforcement, military personnel, and civilian shooters alike.

The brand’s enduring success stems from a dedication to understanding the evolving needs of its customers and adapting its offerings accordingly. This long-standing legacy continues to shape Bianchi’s approach to holster design and sizing today.

Evolution of Bianchi’s Sizing System

Initially, Bianchi relied on more traditional holster sizing methods, often based on specific firearm models. However, recognizing the vast array of firearm variations and the need for a more precise fit, Bianchi developed its unique “Fit Group” system. This innovative approach categorizes firearms based on dimensional similarities, rather than solely relying on model names.

Over time, the Fit Group system has been refined and expanded to accommodate new firearms and evolving customer demands, ensuring a consistently accurate and secure holster fit for a wide range of weapons.

The “Legendary Celeste Green” and Brand Recognition

Bianchi is instantly recognizable by its signature “Celeste Green” color, inspired by the vibrant green bicycles of Milan. This distinctive hue, adopted in 1958, has become synonymous with quality, craftsmanship, and a rich heritage in the firearms accessories industry. The color isn’t merely aesthetic; it’s a symbol of Bianchi’s commitment to excellence.

This strong brand recognition builds trust among firearm enthusiasts, assuring them of a premium product and reliable holster fit, contributing to Bianchi’s enduring legacy.

belling range cooker instructions manual

Welcome to the Belling Range Cooker Instructions Manual! This guide provides essential information for safe installation, operation, and maintenance of your cooker. Discover tips for optimal performance and troubleshooting to enhance your cooking experience.

1.1 Overview of Belling Range Cookers

Belling range cookers are high-quality appliances designed for versatility and durability. Available in various models, such as the Farmhouse and Cookcentre series, they offer advanced features like multiple ovens, separate grills, and multi-zone hobs. These cookers cater to diverse cooking needs, whether you prefer gas or electric options. With sleek designs and finishes like cream or charcoal, Belling range cookers blend functionality with style, making them a perfect addition to modern kitchens. Their robust construction ensures long-lasting performance, while innovative features enhance your cooking experience.

1.2 Importance of Reading the Manual

Reading the Belling range cooker manual is crucial for safe and effective operation. It provides essential safety guidelines, installation tips, and maintenance advice. Understanding the control panel and features ensures optimal performance. The manual also offers troubleshooting solutions and warranty details. By following the instructions, you can prevent accidents, extend the appliance’s lifespan, and make the most of its capabilities. Familiarizing yourself with the manual helps you navigate features like multi-zone hobs, ovens, and grills efficiently, ensuring a seamless cooking experience while adhering to manufacturer recommendations.

Safety Precautions and Guidelines

Always follow safety guidelines to ensure safe operation. Keep children away, avoid flammable materials nearby, and ensure proper ventilation. Regularly inspect gas and electrical connections for leaks or damage; Adhere to manufacturer instructions to prevent accidents and maintain appliance efficiency.

2.1 General Safety Information

Ensure safety by keeping children away from the cooker and avoiding flammable materials nearby. Always turn off the appliance when not in use and never leave cooking unattended. Regularly inspect the cooker for damage or wear, and follow the manufacturer’s guidelines for operation. Proper ventilation is essential to prevent carbon monoxide buildup. Avoid using damaged cables or plugs, and never attempt repairs yourself. Adhering to these precautions will help prevent accidents and ensure efficient, safe operation of your Belling range cooker.

2.2 Electrical Safety Tips

Always ensure your Belling range cooker is installed by a qualified electrician to meet safety standards. Avoid overloading circuits and use the correct rated cable. Keep the cooker dry and never operate it with wet hands. Do not use damaged plugs or cables, as this can cause electrical hazards. Ensure the appliance is properly grounded and disconnect it when not in use. Follow the manufacturer’s guidelines for electrical connections to prevent shocks or fires. Regularly inspect electrical components for wear and tear to maintain safety.

2.3 Gas Safety Precautions

Ensure your Belling range cooker’s gas connection is installed by a Gas Safe registered professional. Always check for gas leaks by applying soapy water to connections—bubbles indicate a leak; Keep the area well-ventilated to prevent carbon monoxide buildup. Never use the cooker if you suspect a gas leak; turn off the supply immediately. Avoid leaving cooking unattended, especially when using gas burners. Follow the manufacturer’s guidelines for ignition and flame adjustment. Regularly inspect hoses and connections for wear and tear. In case of emergencies, turn off the gas supply and contact a professional.

Installation and Setup

Proper installation ensures safe and efficient operation of your Belling range cooker. Follow the manual’s guidelines for unpacking, placement, and connecting electrical and gas components. Ensure all connections are secure and meet safety standards to avoid hazards and optimize performance.

3.1 Unpacking and Placement

Carefully unpack your Belling range cooker, ensuring all components are undamaged. Place it on a heat-resistant, level surface, away from flammable materials. Ensure proper clearance around the cooker for ventilation. Use the adjustable feet to level the appliance, ensuring stability. Refer to the manual for specific placement recommendations based on your model, such as the Farmhouse 90DFT or Cookcentre 110E. Proper placement is crucial for safe operation and optimal performance of your cooker.

3.2 Electrical Connections

Connect your Belling range cooker to a suitable electrical supply, ensuring compliance with local regulations. Use a qualified electrician for hardwired models. The cooker requires a 230V, 30-45A power supply, depending on the model. For electric models like the Cookcentre 110E, ensure the circuit can handle the maximum power load. Avoid using extension cords and keep the cooker away from water sources. Refer to your specific model’s manual for exact electrical requirements. Proper installation ensures safe and efficient operation of your Belling range cooker.

3.3 Gas Line Installation

Ensure your Belling range cooker’s gas line installation is performed by a qualified technician to meet safety standards. Use approved materials and follow local gas regulations. For models like the Farmhouse 90DFT, connect the gas supply to the designated inlet, ensuring compatibility with your gas type (Natural Gas or LPG). After installation, test for leaks using a soap solution. Proper connections are crucial for safe operation. Refer to your manual for specific requirements and recommendations for your model. Always prioritize safety when handling gas lines.

3.4 Ventilation Requirements

Proper ventilation is essential for safe and efficient operation of your Belling range cooker. Install an extractor fan or chimney-style hood at least 75cm above the hob to remove cooking fumes. Ensure good airflow by keeping kitchen windows or vents open. For gas models, adequate ventilation prevents carbon monoxide buildup. Refer to your manual for specific recommendations tailored to your cooker model. Poor ventilation can lead to reduced performance and safety hazards, so prioritize a well-ventilated cooking environment.

Operating the Belling Range Cooker

This section guides you through operating your Belling range cooker, including understanding the control panel, using the oven, hob, grill, and setting the timer and clock effectively.

4.1 Understanding the Control Panel

The control panel is your command center for operating the Belling range cooker. It features intuitive buttons, knobs, and digital displays for selecting oven functions, adjusting temperatures, and controlling hob zones. Familiarize yourself with the layout to access features like oven timers, grill activation, and heat distribution settings. The panel also includes indicators for active elements and error codes. For models with advanced features, explore touch controls and preset cooking modes. Understanding the control panel ensures seamless operation and enhances your cooking experience with precision and ease.

4.2 Using the Oven

Preheat the oven to the desired temperature before cooking. Select from modes like conventional, fan-assisted, or grill for optimal results. Use the control panel to set the timer and monitor cooking progress. Place food in the center of the oven rack for even heat distribution. Avoid overcrowding to ensure consistent cooking. For specific models, refer to the manual for unique features like slow cooking or defrosting. Always use oven mitts when handling hot dishes. Regular cleaning prevents food residue buildup, maintaining efficiency and hygiene.

4.3 Operating the Hob

To operate the hob, ensure the area is clear of flammable materials. For gas hobs, turn the knob and press the ignition button. Adjust the flame size as needed. For electric or ceramic hobs, select the desired zone and set the heat level using the control panel. Always use cookware with a flat base for even heat distribution. Avoid overheating by monitoring the cooking process. Keep children away while the hob is in use. Refer to your model’s specific features, such as multiple cooking zones or booster functions, for enhanced cooking flexibility and efficiency.

4.4 Grill Functionality

The grill function on your Belling range cooker allows for precise control over cooking. Preheat the grill before use for even browning. Use the dedicated grill controls to adjust heat settings, ensuring optimal results. Place food in the center of the grill pan for uniform cooking. Always use oven gloves to handle hot grill pans. Avoid leaving the grill unattended, especially when cooking fatty foods. Regularly clean the grill and pan to prevent food residue buildup. For energy efficiency, preheat only when necessary and cook in batches if needed. This feature enhances your cooking versatility and delivers professional-grade results.

4.5 Timer and Clock Settings

Set the clock by pressing the clock button and using the +/- controls. The timer helps manage cooking times precisely. Press the timer button, set the desired duration, and start. The cooker will alert you when the timer expires. Use the timer for oven, grill, or hob tasks. Preheat the oven using the timer for optimal results. Ensure the clock is correctly set for accurate timer functionality. Regularly check and adjust the clock during daylight saving changes. This feature streamlines your cooking process, ensuring dishes are perfectly timed and cooked to perfection every time.

Maintenance and Cleaning

Regular cleaning prevents food residue buildup. Wipe the hob and burners daily with a damp cloth. Use gentle cleaners for the oven and exterior. Check parts regularly for optimal performance.

5.1 Daily Cleaning Tips

Daily cleaning is essential to maintain your Belling range cooker’s performance. Wipe the hob and burners with a damp cloth after each use to prevent food residue buildup. For the oven, use a gentle cleaner and avoid abrasive materials to protect the enamel. Remove and clean racks regularly, and always allow surfaces to cool before cleaning. Regular wipedowns of exterior surfaces with a soft cloth will keep your cooker looking new. Daily maintenance ensures longevity and optimal functionality of your appliance.

5.2 Deep Cleaning the Oven

Deep cleaning your Belling oven is crucial for maintaining its efficiency. Start by removing racks and placing them in soapy water. Apply a gentle oven cleaner, avoiding the heating elements. Let it sit overnight, then wipe down surfaces with a damp cloth. For tough stains, use a soft scrubber. Rinse thoroughly and dry with a clean towel. Regular deep cleans ensure your oven remains in top condition and continues to perform optimally.

5.3 Maintaining the Hob and Burners

Regular maintenance of your Belling hob and burners ensures optimal performance. Clean the hob daily with a soft cloth and mild detergent to remove food residue. For gas burners, remove and soak burner caps in warm soapy water. Dry thoroughly before reinstalling. Check gas jets for blockages and ensure proper ignition. Avoid using abrasive cleaners or harsh chemicals, as they may damage the finish. Proper upkeep extends the lifespan of your cooker and maintains its efficiency for years to come.

5.4 Checking and Replacing Parts

Regularly inspect your Belling range cooker’s parts for wear or damage. Check burner caps, jets, and electrical connections for proper function. Clean or replace parts as needed to ensure safety and efficiency; For gas models, verify that all connections are secure and free from leaks. When replacing parts, always use genuine Belling components to maintain performance and warranty validity. Refer to your manual for specific instructions or contact Belling customer support for assistance. Proper part maintenance ensures your cooker operates safely and effectively for years to come.

Troubleshooting Common Issues

Identify and resolve common issues with your Belling range cooker using this section. Address problems like error codes, ignition failures, or uneven heating for optimal performance and safety.

6.1 Oven Not Heating

If your Belling range cooker’s oven isn’t heating, check the power supply and ensure the oven is preheated correctly. Verify that the oven selector switch is in the correct position and the temperature dial is set properly. If the issue persists, inspect the heating elements for damage or wear. For electric models, ensure the oven element is glowing red. Refer to the troubleshooting section in your manual for specific error codes and solutions. If unresolved, contact Belling customer support or an authorized service center for professional assistance.

6.2 Hob Burners Not Igniting

If the hob burners on your Belling range cooker are not igniting, first ensure the gas supply is turned on and the burner caps are properly aligned. Check for blockages in the burner jets or igniter. Clean the igniter gently with a soft brush to remove debris. If using an electric ignition, verify that the spark is present when the knob is pressed. Consult your manual for specific troubleshooting steps or error codes. If the issue persists, contact Belling customer support or an authorized service technician for assistance.

6.3 Grill Malfunction

If the grill on your Belling range cooker is not functioning properly, check if the grill switch is turned on and the oven is preheated correctly. Ensure the grill elements are clean, as food residue can block heat distribution. Verify that the grill pan is placed correctly and the oven door is closed securely. If the issue persists, inspect the grill heating elements for damage or wear. Refer to your manual for specific error codes or troubleshooting steps. Contact Belling customer support or an authorized technician if the problem remains unresolved.

6.4 Error Codes and Solutions

Belling range cookers may display error codes to indicate specific issues. Refer to your manual for a list of codes and their meanings; Common codes relate to temperature sensors, heating elements, or gas supply problems. If an error appears, switch off the cooker, allow it to cool, and restart. If the issue persists, check connections and ensure proper ventilation. For unresolved errors, contact Belling customer support or an authorized technician for assistance. Always follow the manual’s troubleshooting guide for accurate solutions.

Cooking Techniques and Tips

Master your Belling range cooker with expert techniques! Optimize oven performance by preheating and using both cavities for simultaneous cooking. Achieve perfect grilling and energy-efficient practices for delicious meals.

7.1 Optimizing Oven Performance

Preheat your Belling oven to ensure even cooking. Use both cavities for simultaneous cooking to save time and energy. Adjust shelves to accommodate different dish sizes. For best results, use oven-safe cookware and avoid overcrowding. Regular cleaning prevents food residue from affecting performance. Utilize the grill function for crispy finishes. Follow recommended temperatures and timings for consistent outcomes. Experiment with multi-rack cooking for efficient meal preparation. Proper ventilation enhances cooking efficiency and safety. Explore various cooking modes to achieve perfect results for every recipe.

7.2 Mastering Hob Cooking

Mastering hob cooking on your Belling range cooker involves understanding its zones and heat distribution. For gas hobs, adjust flame sizes to suit your cookware. On ceramic hobs, preheat zones before adding pans for even heating. Use cookware with flat bottoms for stability and efficient heat transfer. Avoid overheating to prevent damage. Clean spills immediately to maintain performance. Experiment with different cooking techniques, such as searing or simmering, to achieve desired results. Keep the hob area clear for safe and efficient cooking. Regular maintenance ensures optimal functionality and longevity of your hob.

7.3 Perfect Grilling Techniques

Perfect grilling on your Belling range cooker starts with preheating the grill to the recommended temperature. Position food evenly, ensuring proper air circulation. Adjust heat settings based on the type of food—lower for delicate items, higher for searing meats. Use grill-specific utensils to avoid scratching the surface. For optimal results, clean the grill before and after use to prevent residue buildup. Experiment with marinades and seasonings for enhanced flavor. Refer to your manual for specific grill settings and tips tailored to your Belling model for the best grilling experience.

7.4 Energy-Saving Cooking Practices

Optimize energy efficiency with your Belling range cooker by using the right-sized pots for hob burners and ensuring lids fit properly to minimize heat loss. Preheat ovens only when necessary and use residual heat for finishing dishes. For smaller meals, utilize the secondary oven to reduce energy consumption. Regularly clean burners and vents to maintain efficiency. Consider using the grill or hob for quicker cooking instead of the oven. Refer to your manual for model-specific energy-saving features and tips to reduce your environmental impact while cooking effectively.

Warranty and Customer Support

Your Belling range cooker is backed by a comprehensive warranty. Contact customer support at 0344 815 3740 or access online resources for assistance and troubleshooting.

8.1 Understanding Your Warranty

Your Belling range cooker warranty ensures coverage for parts and labor against manufacturing defects. The warranty period varies by product, typically ranging from one to five years. Registration is recommended to activate benefits; For details, refer to the warranty section in your manual or visit the Belling website. Contact customer support for any warranty-related queries or claims. Proper maintenance and adherence to guidelines are essential to uphold warranty validity. Keep your proof of purchase handy for any warranty service requests.

8.2 Contacting Belling Customer Service

For assistance with your Belling range cooker, contact customer service at 0344 815 3740. This team provides support for troubleshooting, maintenance, and warranty inquiries. Ensure your product is registered for streamlined service. Visit the Belling website for additional contact options, including email and live chat. Representatives are available to address concerns, offer cooking tips, and guide you through resolving issues. Keep your model number handy for efficient support. Belling’s customer service aims to enhance your cooking experience with reliable and prompt assistance.

8.3 Finding Authorized Service Centers

To locate an authorized Belling service center, visit the official Belling website and use the “Find a Service Center” tool. Enter your location or product model number to find nearby authorized centers. These centers provide expert repairs, maintenance, and genuine parts for your range cooker. For further assistance, contact Belling’s customer care team at 0344 815 3740 or through their website. Ensure your appliance is serviced by professionals to maintain its performance and warranty validity. Authorized centers guarantee reliable and efficient support for your Belling cooker.

Thank you for reading the Belling Range Cooker manual. Proper usage ensures safety, efficiency, and longevity. Enjoy cooking with your Belling appliance!

9.1 Summary of Key Points

This manual provides a comprehensive guide for Belling Range Cooker users, covering safety, installation, operation, and maintenance. It highlights essential features like oven, hob, and grill functionality, while offering troubleshooting tips and energy-saving practices. By following the instructions, users can optimize performance, ensure longevity, and cook efficiently. Refer to specific sections for detailed guidance on addressing common issues or enhancing cooking techniques. This manual is designed to empower users with knowledge for safe and effective appliance usage, ensuring a satisfying cooking experience.

9.2 Encouragement for Proper Usage

Proper usage of your Belling Range Cooker ensures safety, efficiency, and optimal performance. By following the guidelines in this manual, you can enhance your cooking skills and prolong the appliance’s lifespan. Explore the cooker’s features, from the oven and hob to the grill, and discover how to use them effectively. Regular maintenance and adherence to safety precautions will help you enjoy a seamless cooking experience. Embrace the full potential of your Belling Range Cooker and create delicious meals with confidence and ease.

Additional Resources

Access additional resources to enhance your Belling Range Cooker experience. Download the full manual, explore online support, and join Belling cooker communities for tips and assistance.

  • Download the full manual for detailed instructions.
  • Explore online support for troubleshooting and guides.
  • Join Belling cooker communities for shared knowledge.

10.1 Downloading the Full Manual

To access the complete Belling Range Cooker manual, visit the official Belling website or authorized distributors. Search by model number or product name to find your specific manual. Download the PDF for detailed instructions, troubleshooting guides, and technical specifications. Ensure you have the latest version for accurate information. This resource is essential for understanding your cooker’s features and maintaining optimal performance. Refer to the manual regularly for operational tips and safety guidelines.

  • Visit the Belling website or authorized sites.
  • Search using your cooker’s model number.
  • Download the PDF for comprehensive guidance.

10.2 Accessing Online Support

Belling offers comprehensive online support to assist with your range cooker. Visit their official website to access FAQs, troubleshooting guides, and customer service contact details. Utilize the AI chat feature for quick answers or reach out to their support team for personalized help. Additionally, Belling’s customer care team is available at 0344 815 3740 for further assistance. Online resources ensure you can resolve issues and optimize your cooker’s performance effortlessly.

  • Visit the Belling website for support.
  • Use the AI chat for instant help.
  • Contact customer care for assistance.

10.3 Joining Belling Cooker Communities

Engage with Belling cooker communities to connect with fellow users, share tips, and gain insights. Join forums, social media groups, or specialized platforms where owners discuss their experiences; These communities offer valuable advice, troubleshooting solutions, and creative cooking ideas. Participate in discussions to enhance your cooking skills and resolve common issues. Belling’s online forums are a great resource for model-specific guidance and updates. By joining these communities, you can maximize your cooker’s potential and stay informed about new features and accessories.

  • Explore forums for user discussions.
  • Connect on social media groups.
  • Share tips and gain insights.

marie callender pot pie cooking instructions

Marie Callender’s Chicken Pot Pie offers a convenient, delicious meal solution. Made with wholesome ingredients and a golden, flaky crust, it’s perfect for quick meals any occasion.

Product Overview

Marie Callender’s Chicken Pot Pie is a savory, comforting meal featuring tender white meat chicken, garden vegetables, and a golden, flaky crust. Made with wholesome ingredients and no artificial flavors, colors, or preservatives, it provides 11 grams of protein per serving. Available in various sizes, the pie caters to individual or family meals. Whether cooked in the microwave or conventional oven, it ensures a quick and satisfying experience. The crust, made from scratch, offers a buttery, flaky texture, while the filling delivers a creamy, well-balanced flavor. Perfect for any occasion, it combines convenience with homemade taste, making it a beloved choice for many.

Cooking Methods

Marie Callender’s Chicken Pot Pie can be cooked in a microwave or conventional oven. Microwave: 5-6.5 minutes, stand 5 minutes. Oven: 400°F for 50-60 minutes, optional foil removal for crispiness.

  • Microwave: 5-6.5 minutes, stand 5 minutes.
  • Oven: 400°F for 50-60 minutes, optional foil removal for crispiness.

Microwave Instructions

Cooking Marie Callender’s Chicken Pot Pie in the microwave is quick and easy. Place the pie in the microwave and cook on high for 5 to 6.5 minutes. After cooking, let it stand for 5 minutes to ensure even heating. Check that the internal temperature reaches 165°F using a food thermometer. The crust should be golden, and steam should rise from the filling. For best results, follow the package instructions precisely, as cooking times may vary slightly depending on the pie’s size. Always ensure the pie is cooked thoroughly before serving to avoid undercooking.

  • Cooking Time: 5-6;5 minutes on high.
  • Standing Time: 5 minutes after cooking.
  • Internal Temperature: 165°F for safety;

Conventional Oven Instructions

Preheat your oven to 400°F (200°C). Place the Marie Callender’s Chicken Pot Pie on a baking sheet lined with parchment paper. Wrap the crust edge with aluminum foil to prevent burning. Bake for 60-65 minutes, or until the crust is golden brown and steam rises from the filling. Ensure the internal temperature reaches 165°F using a food thermometer. Let the pie rest for a few minutes before serving. For a crisper crust, remove the foil during the last 5 minutes of baking. Always follow package instructions for precise cooking times and safety guidelines.

  • Oven Temperature: 400°F (200°C)
  • Cooking Time: 60-65 minutes
  • Internal Temperature: 165°F

Safety Considerations

Always cook Marie Callender’s Chicken Pot Pie until the internal temperature reaches 165°F. Use a food thermometer to ensure safety. Handle hot pies with care to avoid burns.

Internal Temperature

Ensuring the internal temperature of Marie Callender’s Chicken Pot Pie reaches 165°F is crucial for food safety. Use a food thermometer to check multiple spots, especially the filling. Avoid undercooking, as this can lead to foodborne illness. The crust should be golden brown, and steam should rise from the filling when fully cooked. Always let the pie stand for a few minutes after cooking to allow even heat distribution. Proper temperature control ensures a safe and enjoyable dining experience for everyone.

Thawing and Venting

Thawing and venting are essential steps for cooking Marie Callender’s Chicken Pot Pie. Thaw the pie at room temperature for 5 minutes before cooking to ensure even heating. Gently pierce the center crust 4-5 times with a fork to allow steam to escape, preventing crust bursting. Proper venting ensures the filling cooks evenly while maintaining a flaky crust texture. Avoid over-piercing, as this can cause filling leakage. These steps help achieve a perfectly cooked pie with a golden, tender crust and a hot, savory filling.

Tools Needed

To cook Marie Callender’s Chicken Pot Pie, you’ll need a few essential tools. For microwave cooking, a microwave-safe plate is required. For oven cooking, a baking sheet and oven thermometer ensure proper temperature. An air fryer tray is needed for air fryer preparation. A fork is necessary for venting the crust. A food thermometer is crucial to check the internal temperature, ensuring food safety. These tools help achieve a perfectly cooked pie with a golden crust and hot, savory filling. Proper tools ensure a hassle-free cooking experience for any method chosen.

Common Mistakes to Avoid

Avoid undercooking by not skipping the standing time after heating. Overcooking can burn the crust, so monitor the pie closely during the final minutes of cooking.

Crust Burning

Crust burning is a common issue when cooking Marie Callender’s pot pies. To prevent this, ensure the oven is preheated to the correct temperature and avoid overcrowding the baking sheet. Covering the edges with foil during cooking can also help protect the crust. For microwave cooking, follow the recommended time and let the pie stand to avoid uneven heating. Always check the crust’s color during the cooking process, and adjust the cooking time if necessary to achieve a golden-brown finish without burning.

Undercooking

Undercooking can result in a soggy crust and uncooked filling. To avoid this, always follow the recommended cooking times for both microwave and oven methods. Ensure the internal temperature reaches 165°F using a food thermometer. For microwaves, cook for 5-6½ minutes, then let stand for 5 minutes. In the oven, bake at 400°F for 50-65 minutes, depending on size. Piercing the crust with a fork before cooking helps steam escape, preventing undercooking. Avoid opening the oven door too early, as this can disrupt even heating. Proper cooking ensures a crispy crust and fully cooked, safe-to-eat filling.

Tips for Best Results

For optimal results, pierce the crust with a fork to vent steam, ensuring even cooking. Use a food thermometer to confirm the internal temperature reaches 165°F. Let the pie stand for 5 minutes after cooking to allow filling to set. Avoid overheating, as this can cause the crust to burn. For a crisper crust, bake in a conventional oven rather than microwave when possible. These steps ensure a perfectly cooked, flavorful pot pie every time.

Achieving Crispy Crust

To achieve a crispy crust, ensure proper venting by piercing the crust with a fork 4-5 times before cooking. For oven cooking, wrap the crust edge with foil to prevent burning. Cook at 400°F for 50-60 minutes, removing foil in the last 5 minutes for a golden finish. Avoid overheating, as this can cause the crust to burn. Let the pie stand for 5 minutes after cooking to allow the filling to set. These steps ensure a perfectly cooked, flavorful pot pie with a crispy, golden-brown crust every time.

Ensuring Even Cooking

For even cooking, preheat the oven to 400°F and place the pot pie on a baking sheet. Pierce the crust 4-5 times with a fork to vent steam. Cook for 50-65 minutes, depending on size, until the crust is golden and steam rises. For microwave cooking, cook on high for 5-10.5 minutes, then let stand 5 minutes. Ensure the internal temperature reaches 165°F using a food thermometer. Avoid overcrowding the cooking area and rotate the pie halfway through cooking if needed. Proper venting and consistent heat distribution are key to achieving even cooking and a perfectly cooked meal.

Variations

Marie Callender’s pot pies come in different sizes, including 15-ounce options, offering flexibility for individual or family meals. Size affects cooking time, ensuring perfect results.

Different Sizes

Marie Callender’s Chicken Pot Pies are available in various sizes, including a 15-ounce option, making them ideal for both individual meals and family gatherings. The size of the pie directly impacts cooking time, with larger pies requiring longer oven or microwave sessions. This flexibility ensures that whether you’re serving one person or multiple, the pot pie can be perfectly cooked to meet your needs. The range of sizes caters to different appetites and preferences, providing a convenient solution for any meal occasion.

Troubleshooting

Common issues include crust burning or undercooked filling. Adjust cooking time, ensure proper venting, and check internal temperature to resolve these problems effectively.

Soggy Crust Solutions

A soggy crust can be prevented by ensuring proper venting. Pierce the crust with a fork before cooking to allow steam to escape. For microwave cooking, cook on high for 5-6 minutes, then let stand for 5 minutes. In the oven, bake at 400°F for 50-60 minutes, covering edges with foil to prevent burning. If the crust becomes soggy, try broiling for an additional 1-2 minutes to crisp it up. Always check internal temperature reaches 165°F for food safety. Proper cooking techniques ensure a flaky, golden crust every time.

Undercooked Filling Fixes

If the filling is undercooked, ensure the internal temperature reaches 165°F. For microwave, cook in 30-second increments until heated through. In the oven, cover edges with foil and bake at 350°F for an additional 10-15 minutes. Avoid overcooking, as the crust may burn. Always use a food thermometer to verify doneness. Proper cooking ensures a safe and satisfying meal. Follow these steps to achieve a perfectly cooked filling without compromising the crust’s quality. Consistent heat and monitoring are key to resolving undercooked fillings effectively.

Nutritional Information

Marie Callender’s Chicken Pot Pie provides a balanced meal with 11 grams of protein per serving. Made with wholesome ingredients, it contains no artificial flavors, colors, or preservatives. The golden, flaky crust and tender chicken offer a satisfying, nutritious option. With proper cooking, the internal temperature reaches 165°F, ensuring food safety. This dish is ideal for quick, healthy meals, catering to both individual and family needs. Its nutritional profile makes it a great choice for those seeking convenience without compromising on quality or taste.

Comparison of Cooking Methods

Marie Callender’s Chicken Pot Pie can be cooked in the microwave or conventional oven, each offering distinct results. Microwave cooking takes 5 to 6.5 minutes, providing a quick meal, while the conventional oven method requires 50 to 65 minutes, yielding a crisper crust. Both methods ensure the internal temperature reaches 165°F for safety. The microwave is ideal for convenience, while the oven delivers a golden, flaky texture. Letting the pie stand for 5 minutes after cooking is recommended for both methods to ensure even heating and safety. Choose based on your preference for speed or texture quality.

Air Fryer Instructions

Cooking Marie Callender’s Chicken Pot Pie in an air fryer offers a crispy crust and even cooking. Preheat the air fryer to 375°F (190°C). Place the pot pie in the basket, ensuring it fits without overcrowding. Pierce the crust with a fork 4-5 times for venting. Cook for 15-20 minutes, or until the crust is golden brown and the internal temperature reaches 165°F. Let it stand for 5 minutes before serving. This method provides a faster alternative to the oven with similar results, ensuring a flaky, well-cooked crust and hot, savory filling.

Consumer Feedback

Consumers praise Marie Callender’s Chicken Pot Pie for its flaky, buttery crust and savory filling. Many appreciate its convenience for quick meals, with some calling it a comforting, satisfying option. However, some users note the crust can burn easily if not monitored, and the filling may occasionally be undercooked. Overall, it remains a popular choice for its taste and ease of preparation, making it a reliable option for families and individuals seeking a hearty meal without the hassle of cooking from scratch.

Special Considerations

Marie Callender’s pot pies are ideal for family meals and various occasions, offering a warm, comforting experience. They suit both individual and group servings perfectly, ensuring satisfaction for all.

Family Meals

Marie Callender’s Chicken Pot Pie is a perfect solution for family meals, offering a hearty, comforting dish that satisfies both kids and adults. Its wholesome ingredients and flaky crust make it a crowd-pleaser. Whether it’s a busy weeknight or a cozy weekend dinner, this pot pie provides a satisfying meal that brings everyone together. The convenient cooking options allow for easy preparation, ensuring a delicious, stress-free family dining experience. It’s a great way to enjoy quality time with loved ones while savoring a home-style meal without the hassle of from-scratch cooking.

Occasion Suitability

Marie Callender’s Chicken Pot Pie is a versatile dish perfect for various occasions. Whether it’s a cozy family dinner, a casual gathering, or a potluck, this comforting meal is sure to please. Its hearty, satisfying flavor makes it ideal for special events or everyday meals. The pot pie’s convenience also makes it a great option for busy weeknights or when you need a stress-free solution for entertaining guests. Its warm, savory taste and flaky crust ensure it’s a crowd-pleaser, making it suitable for both intimate and larger group settings.

Marie Callender’s Chicken Pot Pie is a delicious, convenient meal option that combines tender chicken, fresh vegetables, and a flaky crust. With easy cooking methods for both microwave and oven, it offers a stress-free solution for any occasion. Whether you’re preparing a family dinner or a quick meal for one, this pot pie delivers a satisfying, comforting experience. Its wholesome ingredients and golden crust make it a crowd-pleaser, ensuring a warm, savory taste every time. Perfect for busy schedules, Marie Callender’s Chicken Pot Pie is a reliable choice for a hearty, homemade-style meal without the hassle.