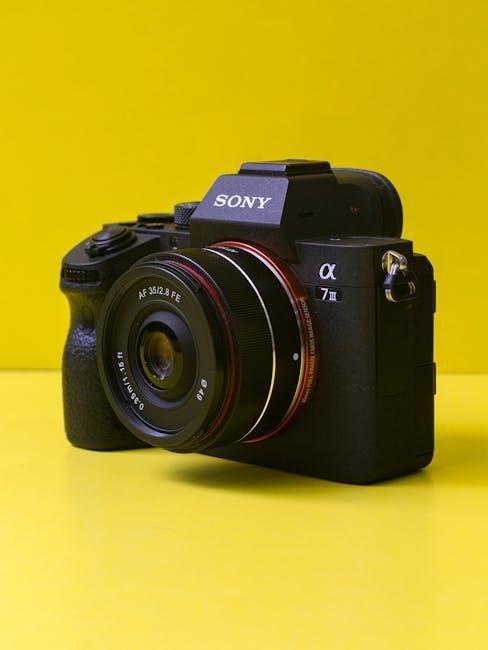
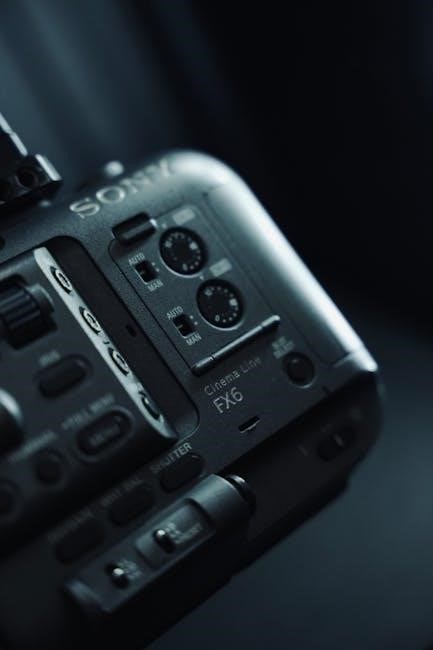
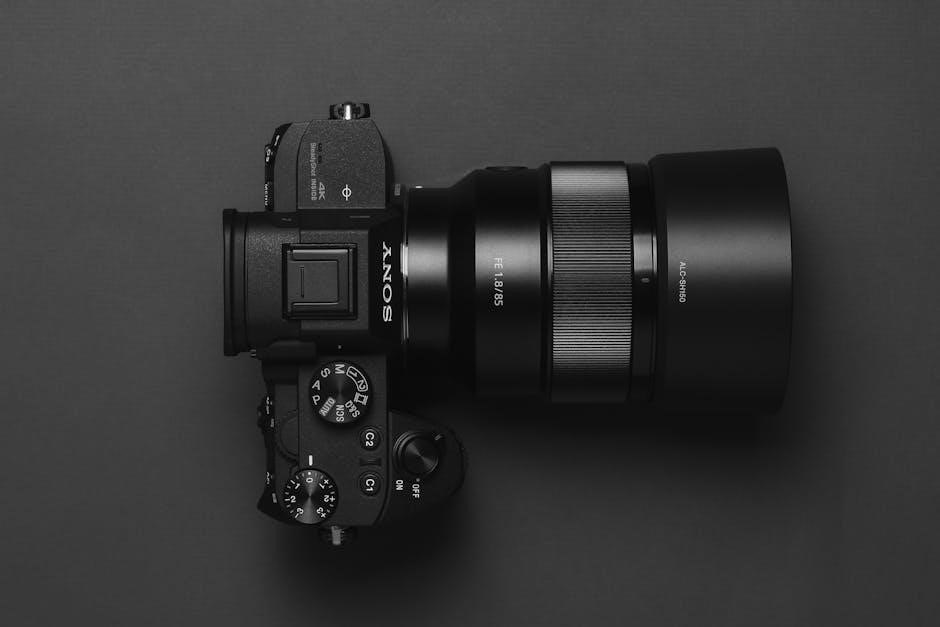
The Sony FX9 represents a pivotal advancement in full-frame filmmaking, offering a compact body and exceptional performance.
Access the official FX9 manual in PDF format for comprehensive guidance, alongside interactive guides and tutorials.
Quick Start Guides cater to both beginners and advanced users, streamlining workflow and maximizing creative potential.
Overview of the FX9 Camera
The Sony PXW-FX9 is a full-frame professional camcorder designed for cinematographers and content creators. It boasts a 6K full-frame sensor, delivering stunning image quality with exceptional low-light performance and shallow depth of field capabilities.
The camera’s compact and lightweight design enhances mobility, while its advanced features, detailed in the Sony FX9 manual, provide extensive control over image parameters.
Users can find the official manual as a PDF, offering in-depth explanations of all functionalities;
Key Features and Specifications
The Sony FX9 features a 6K full-frame CMOS sensor, enabling exceptional image quality and dynamic range. It records in XAVC-I and XAVC-L formats, offering versatile codecs for various workflows. Key specs include ISO 800-32000 (expandable), and 15+ stops of dynamic range.
The FX9 manual details its advanced features like S-Cinetone, HLG, and S-Log3 gamma settings. Connectivity options include HDMI and SDI outputs. Access the PDF manual for complete specifications.

Setting Up Your FX9
Initial setup involves powering on, configuring basic settings, and reviewing the FX9 manual for optimal performance.
Refer to the PDF setup guides for detailed instructions on lens attachment and media card installation.
Initial Camera Setup
Begin by securely installing a fully charged battery and compatible media card. Power on the Sony FX9 and follow the on-screen prompts to set the language, date, and time.
Consult the official FX9 manual (available as a PDF) for detailed guidance on initial configuration.
Pay close attention to the menu navigation and customization options, tailoring the camera to your specific shooting preferences. Ensure proper network connection setup as detailed in the provided guides.
Attaching and Configuring Lenses
Carefully attach your chosen lens to the Sony FX9, ensuring a secure connection. Utilize the lens lock function to prevent accidental detachment during operation – refer to the manual for details.
Navigate to the camera’s menu to configure lens settings, including aperture control and focus modes.
The FX9 manual (PDF format) provides specific instructions for various lens types and optimal configuration for different shooting scenarios. Remember to calibrate lenses for peak performance.
Media Card Installation and Formatting
Proper media card handling is crucial for reliable recording with the Sony FX9. Locate the media card slots and gently insert compatible cards, ensuring correct orientation.
Before first use, or after capturing footage, format the cards directly through the camera’s menu system.
The FX9 manual (available as a PDF) details supported card types and formatting procedures, preventing data corruption and ensuring optimal performance. Always eject cards safely.
Understanding the FX9 Interface
The FX9’s interface offers extensive customization options. Explore the manual (PDF format) to master menu navigation, button functions, and viewfinder settings.
Personalize your workflow!
Menu Navigation and Customization
The FX9’s menu system, detailed within the official manual (available as a PDF), is logically structured for efficient operation. Users can navigate through various settings using the dials and buttons, accessing options for recording, display, audio, and system configurations.
Customization is key; assign frequently used functions to buttons for quick access. Save personalized profiles to recall preferred settings for different shooting scenarios. The interactive PDF manual provides visual aids to streamline this process, ensuring a tailored user experience.
Button and Dial Functions
The FX9’s physical controls, thoroughly explained in the Sony FX9 manual (PDF format), offer intuitive operation. Dials adjust settings like iris, shutter speed, and white balance, while dedicated buttons control recording, playback, and menu access;
Customization is paramount; re-assign button functions to match your workflow. The manual details each control’s default behavior and customization options. Mastering these functions, aided by the interactive PDF, unlocks efficient and precise camera operation during shoots.
Viewfinder and LCD Screen Settings
The FX9’s viewfinder and LCD screen, detailed in the Sony FX9 manual, provide critical monitoring tools. Adjust brightness, contrast, and color temperature for accurate image assessment. Utilize peaking and zebra patterns for precise focus and exposure control;
Customize display information, including frame rates, audio levels, and timecode. The interactive PDF manual guides you through these settings, ensuring optimal visibility in various shooting conditions. Properly configured displays are essential for professional results.
Recording Basics
The FX9 manual details essential recording parameters. Select appropriate modes and frame rates for your project. Explore diverse audio options and master white balance/exposure settings;
Recording Modes and Frame Rates
The Sony FX9 manual comprehensively outlines available recording modes, including XAVC-I and XAVC-L, each offering varying levels of compression and quality. Understanding these options is crucial for balancing storage needs with desired visual fidelity.
Frame rate selection is equally important, with the FX9 supporting a wide range from 23.98fps to 120fps for slow-motion capabilities. The manual details how to adjust these settings for different creative effects and project requirements, ensuring optimal results for every shooting scenario.
Audio Recording Options
The Sony FX9 manual details extensive audio recording capabilities, including 4-channel audio input with professional XLR connectors. Users can select various audio recording formats and levels, ensuring pristine sound quality for their projects.
The manual explains how to utilize the FX9’s built-in audio controls, such as attenuators and filters, to manage and refine incoming audio signals. It also covers external audio recorder synchronization, vital for professional workflows demanding the highest audio fidelity.
White Balance and Exposure Settings
The Sony FX9 manual comprehensively covers achieving accurate color and optimal brightness. It details various white balance presets, alongside custom settings for precise color rendition in diverse lighting conditions.
Users learn to leverage the camera’s exposure tools, including auto and manual modes, to control aperture, shutter speed, and ISO. The manual explains how to utilize zebras and false color for accurate exposure assessment, ensuring visually stunning footage.

Advanced Recording Features
The Sony FX9 manual details utilizing S-Cinetone, picture profiles, slow motion, high frame rates, timecode, and genlock for professional results.
Explore advanced workflows and unlock the camera’s full creative potential through detailed explanations.
S-Cinetone and Picture Profiles
The Sony FX9 manual extensively covers S-Cinetone, a pre-programmed gamma curve delivering a cinematic look straight out of the camera, minimizing post-production grading.
It details how S-Cinetone prioritizes skin tone reproduction and mid-tone detail, ideal for interviews and narrative work.
Furthermore, the manual explains utilizing customizable picture profiles, including standard options and the ability to create and save personalized settings for diverse shooting scenarios.
Understanding these profiles is crucial for achieving specific looks and maintaining consistency across projects.
Slow Motion and High Frame Rate Recording
The Sony FX9 manual provides detailed instructions on leveraging the camera’s high frame rate capabilities for stunning slow-motion footage.
It explains how to select appropriate recording modes and frame rates, such as 120fps, to achieve desired slow-motion effects.
The manual clarifies the impact of shutter angle and resolution on slow-motion quality, offering guidance for optimal settings.
It also covers considerations for audio synchronization when shooting at higher frame rates, ensuring professional results.
Using Timecode and Genlock
The Sony FX9 manual thoroughly explains the benefits of utilizing timecode and genlock for professional multi-camera setups and post-production workflows.
It details how to configure timecode settings, including options for free-run, drop-frame, and external timecode synchronization.
The manual clarifies the genlock functionality, enabling precise synchronization with external video sources for broadcast and cinematic applications.
It provides step-by-step instructions for connecting and configuring genlock devices, ensuring stable and reliable synchronization.
Connectivity and Outputs
The Sony FX9 manual details HDMI and SDI output configurations for diverse workflows.
It explains wireless network connection setup, crucial for remote control and file transfer capabilities.
Explore guides for optimal signal transmission and compatibility.
HDMI Output Configuration
The Sony FX9 manual provides detailed instructions for configuring the camera’s HDMI output, essential for connecting to external monitors and recorders. Users can select from various output formats, including 4K UHD, Full HD, and different color spaces, to match their display or recording device.
The manual clarifies settings for HDMI information display, allowing control over on-screen data like frame rate, timecode, and audio levels. It also covers HDMI output with or without alpha channel, crucial for compositing workflows. Understanding these settings ensures optimal image quality and compatibility with professional equipment.
SDI Output Settings
The Sony FX9 manual comprehensively details SDI output configuration, vital for professional video workflows. Users can select from a range of SDI formats, including 3G-SDI and 12G-SDI, to accommodate different transmission distances and resolutions.
The manual explains how to adjust SDI levels, color space, and gamma settings for optimal compatibility with external recorders and switchers. It also covers configuring SDI output for embedded audio and timecode. Proper SDI setup, as outlined in the manual, guarantees a clean and reliable signal transmission.
Wireless Network Connection Setup
The Sony FX9 manual provides detailed instructions for establishing a wireless network connection, enabling remote control and file transfer. A PDF setup guide (5.7MB) simplifies the process, covering both infrastructure and ad-hoc network modes.
The manual guides users through selecting the correct network, entering the password, and configuring IP address settings. Successful connection allows for camera control via a smartphone app and facilitates seamless file transfer to a computer. Refer to the manual for troubleshooting common connection issues.

Firmware Updates
The Sony FX9 manual details checking for and installing firmware updates, crucial for optimal performance.
Versions like PXW-FX9 V4.02 and XDCA-FX9 V2.20 enhance functionality and stability.
Checking for Firmware Updates
The Sony FX9 manual emphasizes regularly checking for firmware updates to ensure peak camera performance and access to the latest features. This process typically involves navigating to the camera’s menu system, specifically the ‘System’ or ‘Setup’ section. Within these menus, a ‘Firmware Update’ option allows the FX9 to connect to Sony’s servers and verify if a newer version is available.
The camera will display the current installed version and, if an update exists, prompt you to download and install it. It’s vital to follow the on-screen instructions carefully during this process to avoid any potential issues. Always ensure a stable power source during the update.
Installing Firmware Updates
According to the Sony FX9 manual, installing firmware requires careful attention. After downloading the update, the camera will guide you through the installation process. Crucially, maintain a stable power supply – interruption can brick the camera. The FX9 will likely restart several times during installation; do not power it off.
Follow all on-screen prompts precisely. The process may take several minutes. Once complete, verify the new firmware version in the camera’s system menu to confirm successful installation. A successful update enhances stability and unlocks new functionalities.
Firmware Version PXW-FX9 V4.02
PXW-FX9 V4.02, detailed in the Sony FX9 manual, delivers significant improvements to overall camera performance and stability. This update addresses several user-reported issues, enhancing reliability during extended recording sessions. It also optimizes compatibility with various accessories, including the XDCA-FX9.
Users are strongly encouraged to update to this version for a smoother workflow. The release notes, available on the Sony support website, outline all changes and fixes included in V4.02. Ensure a stable power source during the update process.
Troubleshooting Common Issues
The Sony FX9 manual provides solutions for common problems like power failures, media errors, and audio glitches.
Refer to the guide for detailed steps to resolve these issues quickly and efficiently.
Camera Not Powering On
If your Sony FX9 fails to power on, the official manual recommends checking the battery first. Ensure a fully charged, compatible battery is correctly installed.
Verify the power adapter is functioning correctly and securely connected to both the camera and a working power outlet.
Inspect the DC IN jack for any damage or obstructions. If the issue persists, consult the troubleshooting section of the FX9 manual for further diagnostic steps, including potential firmware-related concerns.
Recording Media Errors
Encountering recording media errors on your Sony FX9? The official manual advises verifying media card compatibility and formatting. Ensure you’re using a supported card type, properly formatted within the camera itself.
Check for physical damage to the card or the camera’s media slot. Attempt recording with a different, known-good card.
If errors continue, consult the FX9 manual’s troubleshooting guide for potential firmware updates or more advanced solutions.
Audio Problems
Experiencing audio issues with your Sony FX9? The official manual stresses checking all cable connections and microphone settings. Verify proper input levels and ensure phantom power is engaged if required for condenser microphones.
Confirm the selected audio input channel corresponds to your microphone’s connection. Review the FX9’s audio menu for any muted channels or incorrect gain staging.
Consult the manual’s troubleshooting section for further guidance on resolving audio-related concerns.

Battery Management
The Sony FX9 manual details compatible battery types and proper charging procedures. Optimize recording time using power-saving features and monitor the low battery indicator.
Battery Types and Charging
The Sony FX9 utilizes the NP-FZ100 battery series, offering reliable power for extended shooting sessions. The manual recommends using official Sony batteries for optimal performance and safety; Charging can be done via the camera’s USB-C port or with a dedicated BC-FZ100 charger.
Always ensure the battery is fully charged before critical shoots. The FX9 manual cautions against using third-party chargers, as they may damage the battery or camera. Proper battery care extends lifespan and ensures consistent operation during demanding productions.
Battery Life and Power Saving Tips
The Sony FX9’s battery life varies based on recording settings and usage. The manual estimates approximately 220 minutes of continuous recording with a fully charged NP-FZ100 battery. To maximize runtime, utilize power-saving features like auto power-off and LCD brightness adjustment.
Disable unnecessary functions, such as Wi-Fi, when not in use. The FX9 manual suggests employing external power sources for prolonged shoots. Regularly check the low battery indicator and consider carrying spare batteries for uninterrupted filming during critical moments.
Low Battery Indicator
The Sony FX9 features a clear low battery indicator, visually alerting users to diminishing power reserves. According to the manual, the indicator flashes when remaining capacity is low, prompting immediate action. This warning ensures uninterrupted recording during critical shoots.
The manual recommends promptly replacing or recharging the battery upon seeing the flashing indicator. Ignoring this warning may lead to unexpected camera shutdown. Utilizing external power sources is advised for extended operation, preventing workflow disruptions.
Lens Lock Function
The FX9 manual details the lens lock mechanism, preventing accidental detachment during transport or operation.
Engage/disengage for secure mounting, as described in the official documentation.
Understanding the Lens Lock Mechanism
The Sony FX9 manual thoroughly explains the lens lock’s function, a crucial feature for maintaining secure lens attachment. This mechanism physically locks compatible lenses into place, preventing unintentional disconnections during movement or operation. It’s particularly valuable during handheld shooting or when navigating challenging terrains.
The lock is designed to work seamlessly with Sony’s E-mount lenses, ensuring a robust connection. Refer to the official PDF manual for detailed illustrations and step-by-step instructions on proper engagement and disengagement procedures. Incorrect usage could potentially damage the lens mount, so careful adherence to the guidelines is essential.
Engaging and Disengaging the Lens Lock
According to the Sony FX9 manual, engaging the lens lock involves a simple yet deliberate action. Locate the lens lock switch on the camera body and slide it into the locked position after securely mounting the lens. This prevents accidental detachment, especially with heavier lenses.
To disengage, slide the switch back to the unlocked position before attempting to remove the lens. Never force the lens off while the lock is engaged, as this could cause damage. The PDF manual provides visual aids demonstrating the correct procedure for safe and efficient operation.

Quick Reference Guide
The FX9 Quick Reference Guide, created by Alister Chapman, offers essential settings for fast setup, commonly used functions, and S-Cinetone tips.
This interactive PDF is readily accessible on mobile devices for on-location convenience.
Essential Settings for Fast Setup
For rapid deployment, prioritize setting the media to your preferred format – often XAVC-I for high-quality recording. Configure the picture profile; S-Cinetone delivers a beautiful, filmic look straight out of the camera, ideal for many projects.
Establish your desired frame rate and shutter angle, considering the creative intent. Ensure proper white balance is set for accurate color representation. Finally, verify audio levels and input sources for clean, professional sound.
These initial steps will ensure a smooth and efficient workflow.
Commonly Used Functions
Frequently accessed features include assigning custom buttons for quick access to essential controls like ISO, aperture, and white balance. Utilize the focus assist tools – magnification and focus peaking – for precise critical focus. Mastering the zebra stripes helps manage exposure effectively, preventing over or underexposure.
The waveform monitor provides detailed exposure information. Regularly check and adjust audio levels using the built-in meters. Explore the various picture profile options to tailor the image to your specific needs.
S-Cinetone Tips
S-Cinetone delivers a cinematic look straight out of the camera, ideal for projects needing minimal color grading. Adjust the Gamma and Color Matrix settings within S-Cinetone for subtle image refinement. Utilize the saturation controls to fine-tune color intensity, avoiding overly vibrant or muted results.
Experiment with the knee settings to manage highlights gracefully. Combine S-Cinetone with LUTs for creative looks, but monitor for potential color shifts. Refer to the FX9 manual for detailed S-Cinetone customization options.
FX9 Manual (PDF) Access
Download the official Sony FX9 manual in PDF format for detailed instructions.
An interactive PDF ensures easy access on smartphones during on-location shoots.
Advanced users will benefit from the Quick Start Guide.
Downloading the Official Manual
Accessing the Sony PXW-FX9 manual is straightforward, providing a wealth of information for optimal camera operation. Sony provides a comprehensive PDF version of the manual directly through their support website, ensuring users have readily available documentation.
This official manual covers every aspect of the FX9, from initial setup and basic operation to advanced features and troubleshooting. It’s a vital resource for both novice and experienced filmmakers seeking to fully utilize the camera’s capabilities. The downloadable PDF format allows for offline access and convenient searching.
Interactive PDF Format
The Sony FX9 manual isn’t just a static document; it’s offered in an interactive PDF format designed for modern filmmakers. This enhanced format ensures easy navigation and quick access to specific information while on location.
Users can effortlessly jump between sections, utilize internal links, and search for keywords, streamlining the process of finding answers. This interactive PDF is optimized for smartphone viewing, making it a practical tool for on-set reference and problem-solving, enhancing workflow efficiency.
Advanced Users Quick Start Guide
The Sony FX9 caters to experienced cinematographers with a dedicated Advanced Users Quick Start Guide. This resource bypasses basic setup, focusing on recommended workflows for seasoned professionals.
It dives directly into advanced settings, optimal configurations for specific shooting scenarios, and maximizing the camera’s full-frame capabilities. This guide streamlines complex tasks, enabling experienced users to quickly leverage the FX9’s power and achieve professional-grade results efficiently.
XDCA-FX9 Accessory
The XDCA-FX9 expands the FX9’s capabilities, offering advanced connectivity.
Refer to the PDF Setup Guide for wireless network connection details and Firmware Version V2.20 updates.
Understanding the XDCA-FX9
The XDCA-FX9 is a crucial accessory that significantly enhances the Sony FX9’s functionality, primarily by enabling 12G-SDI output and providing advanced connectivity options for professional workflows. This accessory allows for longer cable runs and compatibility with a wider range of broadcast and cinema equipment.
It’s essential to ensure the XDCA-FX9 is running the latest firmware, currently Version V2.20, to guarantee optimal performance and compatibility with the FX9. Regularly checking for updates is recommended. The accessory integrates seamlessly with the FX9, expanding its versatility for demanding production environments.
Firmware Version XDCA-FX9 V2.20
Version V2.20 of the XDCA-FX9 firmware delivers crucial improvements to system stability and enhances compatibility with the PXW-FX9 camera. This update addresses potential issues and optimizes performance for professional video production workflows.
It’s highly recommended that all users upgrade to this latest version to benefit from these enhancements. Before installation, carefully review the release notes for detailed information regarding changes and any necessary precautions. Maintaining up-to-date firmware ensures a seamless and reliable operational experience.
Setup Guide for Wireless Network Connection
Establishing a wireless network connection with your Sony FX9, via the XDCA-FX9 accessory, unlocks remote control and file transfer capabilities. A comprehensive PDF Setup Guide (5.7 MB) is readily available for download, detailing each step of the process.
This guide provides clear instructions on configuring network settings, connecting to access points, and troubleshooting common connectivity issues. Successful setup enables efficient workflow and streamlined content management during on-location shoots.